
Several months ago, I noticed a post on a polymer clay newsgroup from Oklahoma's
Belinda Birnbaum about using
china markers to tint translucent polymer clay. I was intrigued since I really wasn't sure what a china marker was and even more intrigued when I saw her beautiful finished beads. Belinda, whose first passion is jewelry design, has worked with polymer clay for less than two years. She was doing some experimentation with colored pencils and picked up one of the china markers (aka a grease pencil) by mistake. She "scribbled" on unconditioned translucent clay and mixed the color in during the conditioning process. I loved the results that she got and wrote to her for permission to post her discovery here.
While I was waiting for a reply from her yesterday, I went to my local craft store looking for china markers and purchased what I
thought Belinda had used to make her beads. After talking to her again, it was obvious that I had
not made a wise shopping decision. The pens I bought were
Pebeo Vitrea 160, actually meant for painting glass and crystal. You
can see how I
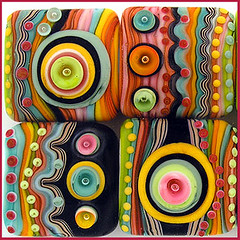
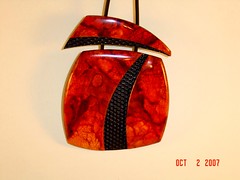
thought I was buying china markers, right? My first thought was to return them. But I decided to follow Belinda's lead and do some experimentation. If it didn't work out, I would coerce my boys into using them to decorate a gift for their grandmother. I spent a few minutes yesterday evening with an old translucent cane and the two markers I bought and here are my sample chips.

I used a small brush to apply the expressed green ink to a translucent cane slice, let it dry (just took a couple of minutes), and then burnished it, ink side down, onto another piece of clay. You can also see an unpainted slice at the top. I placed a painted cane slice onto gold leaf to see if the color was transparent enough to allow the leaf to show through. It was. I used a ball stylus to scribble on a piece of white clay and then encased it with translucent.
So, maybe my shopping mistake has some possibilities. There's still much to explore. If anyone else has worked with these pens or the Pebeo paints and would like to share their discoveries, please feel free to comment.
I want to thank Belinda for the inspiration to experiment with the Pebeo pens and for generously sharing her china marker discovery. I think both of these products are worth a closer look if you enjoy doing translucent layering and they may be compatible with liquid clay, as well. Perhaps you could use them to draw between layers of cured liquid. I hope you'll follow the wonderful example she's shown and not be afraid to experiment with products you already have. If it doesn't work out, learn from it, toss it (or not), and try something else. The only way we can grow as artists is to be fierce (thank you, Tyra Banks!) in our dedication to learning as much as we can about the materials we work with. Don't spend all your time reading about it or talking about it. Get your hands dirty! And to clean them afterwards,
Marla Frankenberg highly recommends
this stuff.
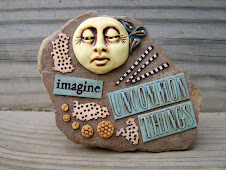
 Today's a busy day but I wanted to at least share some cool and freaky Halloween dudes with you. Frankie is from Linda Weeks of It's Jest'er Clay. She's quite a talented lady who makes wonderful and whimsical sculptures and manages to make it all look so easy. She's a natural!


